Sunday, November 27, 2011

Winter Vehicle Emergency Kit


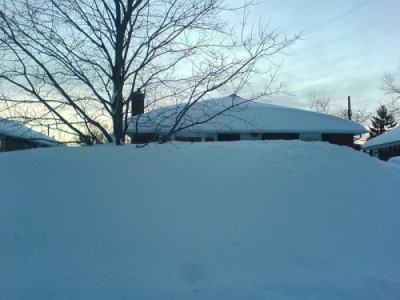
Picture this. You are driving your car, either by yourself or with your children. It's cold, dark, and there are several inches of snow on the ground. The road is slick. Suddenly you realize you're going too fast and before you know it you're stuck in the ditch.

Credit: Free images from acobox.com
You are miles away from home, town, or any other people that could help you. No cell phone reception either.  Cars passing by are far and few in between, if at all. The visibility is low and not many people could see you anyway. What do you have in your car that will help you get through this? You start looking and realize that you forgot your heavy coat. You didn't really need it, you were just going for a quick ride into town, right?

You begin to realize you are going to be there for a while and need something to keep you and the kids warm, but nothing is to be found. Then, the kids begin whining because they are hungry and scared. What do you do?

Well in this situation, there's not much to do but comfort the children and hope and pray that someone stops for you. But since we're not really in this position we can prevent it before it happens. This is why it is important to make sure you have the necessities for winter driving.

So, what can we keep in the car that would help in this situation? First of all we have several main things we need to focus on. These are warmth, visibility, food and water. Let's start out with warmth, our most important factor in cold weather.

Warmth
I always keep a heavy blanket for each person in my truck because of the described scenario above. Also, I include several emergency blankets in my truck. They are small and light, so it makes it easy to keep a few on hand, just in case. In addition, I keep enough hand and body warmers for each person. If it is below freezing, these could prevent losing finger or toes due to frostbite.

In addition to these, keep a few good pairs of gloves and scarves in the car too. These will come in handy if you need to go out and change a tire, etc.

Visibility
Next on on our list is visibility. The first thing I would want would be a reflective triangle to place on the road. This will get people's attention, and possibly get you out of there sooner. It can also help if you are stuck on the road by preventing you from getting rear-ended, etc. due to low visibility.
Always keep a couple flashlights in the car. My opinion is that you can never have too many! Another great item to have on hand is a headlamp. These are invaluable while changing a tire ;)

For the kiddos, glow sticks are a great way to calm them down and give them something to play with.

Food and Water
This is an area where you will have to take into account what you and your kids like to eat. Personally, I keep a box of Clif bars in my truck. I like to eat them, and they're not messy. Try to keep something that is not too salty or sweet so you aren't even more thirsty. (Bathroom trips in the snow aren't fun ;)

If this was to turn into something longer than a several hour ordeal, then we would need something more than just granola bars however. Merchants on Amazon.com sell emergency food bars that contain several thousand calories that are meant for these types of emergencies. I have never tried them, but if space is limited these may be a good option for you.


For water, I normally keep a 24-pack of bottled water with me. I drink them at work, so they get rotated frequently. If you don't a lot of room, a couple 2-liter bottles could easily fit under the passenger seat or in the trunk.

This is intended to be in addition to an already well rounded vehicle emergency kit. I hope to post soon on what to keep in your vehicle year round.


Did I forget anything? What do you keep in your vehicle in the winter? Let me know in the comment section below! :)


This blog post is linked to Homestead Revival Preparedness Challenge #30 , Homestead Revival Barn Hop #38, Frugal Days, Sustainable Ways ,Teach Me Tuesdays, It's A Keeper Thursday, and Simple Lives Thursday.


Wednesday, November 23, 2011

I Am Thankful For...

What am I thankful for? That is something that we don't think a lot about through the rest of the year. Sometimes life can become overwhelming and we only think of the problems in our lives (well, I do anyway) instead of everything we have to be thankful for. So, here are my top five things I am thankful for.

1. My Lord and Savior Jesus Christ. Without Him I am nothing. He gives me strength to continue through hard times and rejoices with me in good ones.

2. My Husband. I am thankful for God putting the one man on earth that could put up with me, in my life ;) I am thankful that he listens quietly when I am confused about a decision I need to make (which has been happening a lot here lately) and he listens to me blow off steam after a night at work. (two whole hours yesterday morning....) Most of all I am thankful that he is my best friend and always by my side.

3. My Family. I am very close to my family, and I could not imagine life without any of them. 

4. Our Jobs. In these hard economic times, even an imperfect job is something to be thankful for. I am thankful that I have a job that provides excellent benefits and my husband has a job that he enjoys and pays the bills.


5. The opportunity to homestead. Although I may not be as far in my homesteading journey as I would like to be, it is simply that. It's a journey. I need to take the time to enjoy it more than I do now.

Your turn! What are some things you are thankful for?

Thursday, November 17, 2011

Gulliver's Corn

With Thanksgiving approaching fast, I would like to share my absolute favorite holiday side dish. It is called Gulliver's Corn. Until I wrote this post, I didn't know where the name or recipe came from. I simply knew that everyone loved it and it's a holiday staple in our family. After some research though, I found that this recipe is from a restaurant called "Gulliver's" in Los Angeles. The story is that the LA Times coerced some restaurant employees to give up the recipe. I don't know if it is true or not, but I do know that this stuff is delicious!

Be warned, it is choc full of fat, but what holiday food isn't?

Gulliver's Corn

Ingredients

  • 2 (20 ounce) packages frozen corn kernels, thawed
  • 1 cup whipping cream
  • 1 cup milk
  • 1/2 cup freshly grated Parmesan cheese
  • 1 teaspoon salt
  • 2 tablespoons sugar
  • 2 tablespoons flour
  • 2 tablespoons butter, melted

Directions

  1. Place corn kernels, whipping cream, milk, salt, and sugar, in a large stockpot. Bring to a slow, low boil beginning on medium heat, stirring frequently. Simmer for 5 minutes on low heat.
  2. Melt butter in the microwave, or in a small saucepan on low heat. Whisk in flour until smooth. Stir into the corn until well blended.
  3. Top with Parmesan cheese and cook under broiler until browned. Enjoy! 
  4.  

    New Blog Hops!

    This week I joined a couple new blog hops and I thought I would share them. The first one is My Simple Country Living's Homemade Gifts from the Heart blog hop. It is a collection of all of our homemade gifts for the holidays! I don't know about you, but I can ever get enough ideas for homemade gifts :)


    The second one I joined is Frugal Days, Sustainable Ways. Join Frugally Sustainable every Wednesday and share your frugal ideas!
    Have Fun!

    Tuesday, November 15, 2011

    Homemade Laundry Detergent


    One simple way to save money is by not buying laundry detergent. No, I don't mean to stop doing laundry, (although that does sound enticing) but to make your own laundry detergent! There are pages upon pages of different recipes for homemade laundry detergent on the internet. I chose to use a powder detergent because it was easier to make than the liquid. I find it is easier to store than the liquid detergent also. I found this recipe at DIY Natural. They have a cost analysis on their website that breaks the cost per load down to $0.05!


    This saved a lot of time and effort!
    It is a very simple recipe, and it only requires three ingredients. Bar laundry soap (such as Fels Naptha), Arm and Hammer Super Washing Soda, and Borax. For one batch you will need the following,

    1 bar shaved laundry soap
    1 cup A&H Super Washing Soda
    1 cup 20 Mule Team Borax

    Mix together and you're done! Use one tablespoon per load, or 2 for heavily soiled loads.


     Tips

    -  I used an electric grater (Salad Shooter) and it was a lot easier to grate than doing it by hand. If you are using a hand grater, and find that the pieces of soap are too big, let them dry,then process them further into a powder using a food processor.

    -  If you are willing to take the time and prefer a liquid detergent, you can also go one step further and add essential oils to add a fresh scent to your laundry.

    -More recipes (including liquid recipes) can be found at tipnut.com

    Friday, November 11, 2011

    Building Your Homestead on a Dime

      Building up a homestead takes a lot of time and work. It can also take a lot of money. If you have ever looked through a farm supply catalog, you know what I mean. We have lived on our homestead for seven years now, and before we lived here we were on another piece of property for another seven years. We still don't have everything we would like to have. But we do have everything we need.

    There is a way of getting around the high prices at the feed store. It involves a lot of time, and you may not get what you need right away, but the savings pay off in the end.

    Craigslist.org

    Craigslist is where I find the majority of farm items I need. You can find people near you that may be trying to sell the very item you have been looking for. While everything is not in mint condition, you may find a bargain. For several years I have been trying to find a good horse round bale feeder. They run around $400 new at the feed store. I found one on craigslist for $200. Then, when I got there I talked them down to $150. That is a huge savings! It isn't brand new, but it works for what I need.

    Don't stop at the housewares or farm and garden sections though! Make sure you check out the antiques and barter categories. Put up a list of items you would like and items you have to trade. Another man's trash is another man's treasure! 

    The Local Newspaper
    This is a good place to find deals too. I haven't had as much luck with this as I have with craigslist, but it's always worth a quick glance.

    County Based Websites
    Everyone may not be so lucky to have one in their county, but if you do, take advantage of it! My husband and I found a great kitchen table and china hutch for our house through our county website.

    Estate Auctions and Auction Houses
    This is a great place to find anything you are looking for, but unfortunately is the most time consuming of all the methods. Be ready to spend the whole day waiting for the item you are looking at to go up for sale. If you are patient enough though, you can find anything from housewares to farm equipment. A great website to find auctions near you is auctionzip.com.

    Tips

    -Always carry cash, and in different amounts. You know that round bale feeder? I ended up paying $160 because I only had $20 bills on me.

    -Have a list of items you are looking for and the condition you want the item in. This is especially helpful for auctions.

    -Know the value of what you are looking for. Don't end up being the guy that just bid 2X what the item is worth.

    -Be comfortable talking people down on a price. Unless the ad says they won't take any less than the said price, it's probably expected. When I post an item, I always make sure to price it a little high because I know someone will try to talk me down. Others say not to, but in my opinion it never hurts to ask.

    -Network. Get to know people nearby that may be able to help you find what you are looking for.

    -Be safe. A lot of people say not to go to a seller's home. This is good advice, but unfortunately most of the time I can't avoid it because many items are too large to have the seller meet me in town. Make sure someone knows where you are going and when you'll be back. It's even better if you can take someone with you. Most of the time though, the people I meet are great people. I even got a tour of the last person's farm. (They had some adorable Scottish Highland Cattle ;)


    Do you have any favorite websites for farm purchases? I'd love to hear it!

    This post is linked to:
    Barn Hop 66

    Thursday, November 10, 2011

    Regrets

    This morning I was talking to a friend of mine. He is going through extensive radiation and chemotherapy for cancer.

    Normally we spend a while catching up on how the Colts are playing, or how our families are doing. This morning we had a little deeper conversation and I would like to share it. It has touched me personally to change how I look at things and behave.

    He said that like everyone, he has things in his life that he wishes he could change and regrets some things he has done. As I was listening to his words, I didn't expect to hear the next thing he said.

    He told me, that the things that he really regrets are the times God asked him to do something for Him and he didn't do it. He went on to say, things we think about in this life aren't really that important. What is really important is what the Lord will say when we stand before him and are accountable for everything we did, and didn't do.

    I know personally there have been times where I know that I should have spoken up and said something to another person about the unconditional love of God, but I was too afraid. Too scared of what they may say back. Too scared of what they might think about me.

    So, this conversation has challenged me. It has challenged me to do as the Lord says. Whether it be to sit down and have more Bible studies, to speak up when it feels uncomfortable, or whatever He has in store for my life.

    I know I will have regrets when I am nearing the end of my life, but if I listen to the words of a dying man I can reduce the heartache I will feel when that time comes.

    Credit: Free photos from acobox.com


    Sunday, November 6, 2011

    Melatonin, A Natural Sleep Aid


    I know this may be a bit ironic to write about this topic while it's a little after 2am, but I know a lot of people struggle with falling asleep and staying asleep. Since I started working 3rd shift over two years ago, I have had trouble sleeping on my nights off.

    I waited to say anything to my doctor because I was afraid she would immediately put me on a prescription drug. Prescription drugs are useful in many situations, but I was hoping there would be a simpler answer.

    Credit: Free photos from acobox.com
    After over a year of simply sitting up at night surfing the computer, waiting to get sleepy, I finally asked my doctor, "What can I do to fall asleep? It's driving me crazy!" I was very happy with her answer, too. Instead of just writing me a prescription and sending me on my way, she told me to try melatonin. So, I picked up a bottle hesitantly, and tried it. And guess what? It worked!

    Melatonin is a hormone that is naturally produced in your body, that helps you fall asleep. According to Melatonin FAQ, the pineal gland begins producing melatonin when it the body is exposed to darkness, and the production peaks around 2-4am.


    Taking melatonin supplements has been found to help people that cannot sleep due to shift work or simply because their biological clock is not working as it should.


    The recommended beginning dosage is about 1mg, although you may need to increase the dosage. In my personal experience, I have had to gradually increase my dosage from about 1mg to around 6mg to stay asleep through the night, over the course of about 6 months.

    If you are having trouble falling asleep and staying asleep, talk to your doctor about this possible prescription alternative.

    (It normally works too, I just have to remember to take it before bedtime, unlike tonight... ;)


    Sources:
    http://www.melatoninfaq.com/
    http://www.sleepfoundation.org/article/sleep-topics/melatonin-and-sleep


    The information provided here is for informational purposes only. Always consult your doctor before starting any new supplement.

    Friday, November 4, 2011

    Chocolate Covered Coffee Beans

    Since I have already exposed myself as a hardcore coffee drinker, here is another one of my weaknesses...

    Chocolate Covered Coffee Beans

    These things are AMAZING. I first had some when my parents brought a baggie home from their vacation. I was extremely hesitant. Who wants to eat a bitter, roasted coffee bean? Well was I in for a surprise! They are now probably my favorite piece of chocolate.

    The only problem is, they are very pricey. Which means I have only had a handful since I discovered the wonderful combination. Until this week.

    For some reason, it had never crossed my mind to make my own, until my sister made me try a spoonful of coffee grounds and chocolate chips. (crazy, I know, but I had my eyes closed) Then it was like a light bulb went off above my head! Why not make my own?!? Honestly, the grounds and chocolate chips tasted just like what we bought at the store. (ok, may not that good, but close enough)  Sooo, I set to work with a bag of dark chocolate chips and a bag of hazelnut flavored coffee beans.

    To make your own you need your favorite type of chocolate and whole coffee beans. This time, I used dark chocolate, but I would like to try milk chocolate the next time I make them. 

    Some people like to roast the coffee beans before coating them. Personally, I just used them right out of the bag. I like the crunchiness of them and the texture. If you want to roast them first, put them in a preheated oven at 350F for 8-10 minutes.

    First of all, you need a double boiler or a saucepan and a glass bowl to melt the chocolate in. Once the chocolate is melted, add the coffee beans. Mix them around until they are thoroughly coated with chocolate. Other directions say to use a slotted spoon to let the excess chocolate to drip off. But... we're newlyweds and our kitchen isn't completely stocked with utensils yet. So, I used plastic knives to pick them out of the bowl. It works either way!

    If they have an excessive amount of chocolate on them still, (not a bad thing, especially if you're not particularly fond of the coffee beans) try to get them into the freezer as soon as possible to prevent the chocolate from melting into a puddle around the bean.

    And there you have it! Homemade Chocolate Covered Coffee Beans, at a fraction of the cost. I have a feeling these will make great homemade gifts for those that are crazy about coffee, combined with a cute coffee mug!

    Tuesday, November 1, 2011

    November Preparedness Challenge

    Getting Started

    Being prepared for emergencies and potential power outages is an essential part of living a self-sufficient lifestyle. Depending on where you live, you may face tornadoes, snowstorms, hurricanes, wildfires or earthquakes. The sudden snowstorm earlier this week is a perfect example. Millions of people have been out of power and many still are. How you handle these situations will depend on how well you have prepared for them. 

    So, where do you begin? Here is a quick primer on where to start.
    ·         Step One - Start with a emergency plan. Where is your family to meet if your house catches fire? Make sure everyone in the family knows where they should go. It should be easy enough to get to, like a tree in the front yard.

    ·         Step Two – Have “Emergency Bags” ready for every member of the family. An Emergency Bag is a backpack or bag with the necessities needed to survive for 3 days. These should contain complete changes of clothes, shoes, personal information and identification, medications, and food. By having a bag ready to go, this frees up critical time that you may not have in the event of a natural disaster. I keep one for my husband and me, ready to go by our bed in case of a tornado. Because we live in a mobile home, it is very important that we are able to get out to a safe place as fast as possible. FEMA has a good page on what to include in an emergency bag here.
     
    ·         Step Three – Water, no one can live without it. Three days without it, and you’re done for. Make sure you have a minimum of one gallon of water per person, per day for at least three days stored in your home. One gallon per person should be enough for drinking and cooking.

    Step Four - Many people live day to day regarding having food in their home. Have you ever seen a grocery store right before a snowstorm or hurricane? All of the necessities are wiped out, and may not arrive for weeks, depending on the seriousness of the situation. Make sure you and your family can live at least two week on the food in your home. You don't have to go out and buy the latest and greatest food supplies advertised on television.
     

    When you are out grocery shopping, instead of buying one bag of beans, buy two. Then, when you use one of what you bought, you still have one left in the pantry. This way, you can slowly you will start to build up your food storage. Also, be sure that you have food that can be prepared without modern conveniences, such as the microwave or even electricity.

    This is just a brief overview of the many aspects of being prepared for emergencies. I hope to go into more depth on different topics in future Preparedness Challenge posts, so keep reading! The FEMA website has a lot of good information that goes into further detail.